
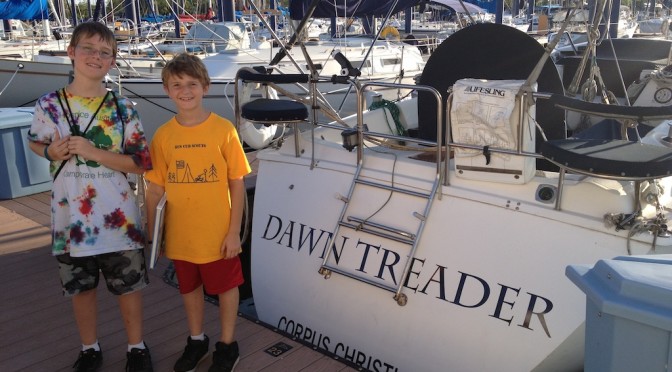
New Name – New Vinyl:
We weren’t happy with the original name of the boat – or with the beat-up striping.

So we called Larry George at Dockside Graphics and asked for a quote. He came back with $800 for replacing all the striping, changing out the name, and re-doing the Hunter logo graphics on the gunwales and topsides – and he could do the work while the boat was in the slip (hence the name). Sounded good to me. I came up with the design, sent him the Illustrator file and he went to work.
This was the fantastic result…


As you can imagine – I HIGHLY recommend the dude. Now it was on to other projects…
The Very Expensive Professional Rat’s Nest:
So – lots to cover in this one. We left off having dropped almost $60K in cash, $9K of it to marine service pros to end up with a bilge full of this…

And instruments that looked like this…

Busted. The wind instruments were non-functional, the radar was non-functional, the speedo was dead. It was a mess. So I went back and forth with South Texas Yacht Services, the guys who had replaced my standing rigging, because this stuff had checked out in the survey. They finally pointed me to a guy named Mike Little – THE marine electronic guru in the area. He told me to look for several things and report back to him. I tried a few of his suggestions – but was just out of my league on this stuff. I asked him to come out. The deal was that if he did so and discovered everything was put back together correctly, and it was just faulty equipment, I’d have to pay the fee for his time. Otherwise, he’d bill STYS. I agreed.
He came to the boat and got way more than he bargained for. First off, he is a GREAT guy. We had a lot in common. He’d lost his wife just a couple of years previously as well.
When he took a look at the above rat’s nest, he shook his head and chuckled. We unwrapped the terminals from the rigging tape. The radar did indeed have a wire that had not been terminated. He got that done and the radar error disappeared. Nice! One problem down.
Next came the wind instrument.

Though it was sloppy and needed some cleanup, everything looked fairly good at the European terminal, but still no signal – so it had to be something else. To be safe, I’d gone ahead and ordered a new transducer. I was hoping and praying that was the problem, instead of a bad wire running down the mast. Pulling new wire for that was going to be a serious PITA.
So, Mike graciously started hauling me up the 53′ mast…and up…and up…and up. Poor dude.
My mast climbing setup was pretty simple. I loosely tied off the main halyard at the deck (to keep it fairly taught and secure), put on my climbing harness, and clipped into it with my Petzl GriGri to use as fall protection.

The beauty of the GriGri is that unlike a figure-8 or ATC, the cam action will automatically lock on the rope in a fall, so you don’t have to continually brake with your hands, leaving them free to work.
However, after my last run up the mast of my old C27 a couple of years ago and hanging in that climbing harness for 45 minutes – squishing “the boys” and slowly losing all feeling in my extremities…

I decided to buy one of these Black Diamond Bosuns Chairs…

It was 1/3 the price of typical marine bosun’s chairs. Now, as you can see, it’s simply a seat (for long belays on a big wall) and is not intended to be used as a typical marine harness/seat combo. But since I already had the harness, this worked perfectly to give me some comfortable support at the top.
I clipped this into the spin halyard and up I went with Mike as the engine…self-belaying with the GriGri on the main halyard as I went. Even though a very cold wind was blowing around 20 knots, it worked like a charm. I stayed tight into the mast and went right up.
I had stuffed the new transducer down the back of my jacket, and some tools into my pocket. Once I got to the top, poor Mike huffing and puffing below, I carefully swapped out the transducers and prayed for it to work. Sure enough, the system sprang to life! Woohoo!
The next thing we looked at was the speed transducer. It had also stopped working after the re-rig as well. I knew how to pull the transducer from the through-hull – but had never actually done so, and was really nervous about the water ingress. Mike explained that most of the Raymarine transducer housings have a valve that would minimize the water ingress. Sure enough, we pulled it and the water quickly decreased to a fast trickle, giving us plenty of time to get the sealing cap on. Easy-peasy.
The problem with the transducer was immediately clear. There were several small, shelled beasties clogging the paddle-wheel. I was amazed. It had only been a few months since we’d hauled and powerwashed the bottom, making sure the paddle-wheel was clear. It was obviously something you needed to look after fairly often in these waters. I elected to leave it out for the time being – deciding I’d put it back in when we start our trip. I had SOG readings with our chartplotter – and wasn’t all that worried about current with our typical bay sailing at this point. So the STW readout could wait.
We now, finally, had full instrumentation. It was a great feeling. And the beautiful part? Mike didn’t charge me a dime for this call.
Before he left, he told me to get those terminals into proper project boxes and clean up that rat’s nest in the bilge. I started in on it…


And still have a ways to go. But it’s getting there.
LED Mania
One of the other projects I wanted to immediately tackle was the interior lighting. I wanted EVERYTHING to be LED. I’d researched enough to know that it was well worth the cost to reduce power consumption by a huge margin while still having nice interior lighting. However, on the forums and typical marine stores I’d always seen prices that were just insane. $20+ for a single freakin’ bulb?
I decided to go for the cheap automotive stuff from Amazon. Here’s what I got…

Warm white festoons ($7 each – or $1 each if you don’t mind the pure white) for these fixtures…

Red festoons ($1.50 each) for these fixtures…

Warm white bayonets ($7 each) for these fixtures…


We also have some airplane-style reading lights in the main saloon, but the bayonets were too big in circumference to fit.

So we had to keep the old incandescent bulbs for now for those fixtures. But, the lighting was PERFECT. It was bright and really nice in color temperature. And the amp draw was virtually nothing with ALL the lights on! It was amazing.
In all, I spent around $180 to equip ALL the fixtures in the boat with LEDs – as well has have quite a few spares left over for everything. It was a great deal.
So with the above work, the Money Blizzard just kept on dumping…
Previous Blizzard Total: $58,725.
Vinyl and Lighting: $1,000
New Blizzard Total : $59,725.
New Nav System:
The next project on the list was the nav system. I prioritized this over the water tank because we really needed to figure out what to do about the chartplotter. The boat came with a seriously old Hammerhead computer with Windows 97 and some crappy charting software. And there was a super cheesy “navpod” at the helm with the horn and AP controls in an aluminum project box. That had to go.

We were using our iPad in a Lifedge case and railmount as our chartplotter, using the iNavx app. We really liked that. But we needed a fully integrated setup with all the Raymarine instrumentation. We decided on a full-featured wireless navigation system using the Brookhouse iMux, which would give us chartplotting, AIS, AP control, and full instrumentation via SeaTalk on our iPads and iPhones. Oh yeah.
Stay tuned!